[vc_row][vc_column][vc_column_text]
Back to Basics: Cinnamon Rolls
I’m kind of a perfectionist, especially in the kitchen. When I make something, I want it to be the absolute best. Unfortunately, there are several areas where I fall short of a perfect mark. Cinnamon rolls were one of those things that took me years to perfect. I know some of you fall into the same category, so I’m here today to discuss the things that I have found make the perfect cinnamon roll. I understand that everybody has their own preferences, quirky ovens, different altitudes, and so on, but I hope that you can take what I’ve learned and apply it to your particular preferences and circumstances.

Many years ago when I would make cinnamon rolls, they would always end up spiraling up and out in the middle. Still delicious, but not exactly appealing to the eye. I learned that to prevent this, I needed to allow enough space between each roll on the baking sheet so they would have enough room to rise out instead of up. Allowing them to fully rise before baking them will also help with this.
After I resolved this issue, another one sprang up. My cinnamon, sugar, and butter filling would always melt out and pool on the bottom of the cinnamon rolls and bake into a burnt mess of hard-candy-not-goodness. I battled with this for years, trying every different method. From melting the butter and combining it with the cinnamon and sugar before spreading it onto the dough to spraying on a butter flavored cooking spray and then layering the brown sugar and cinnamon on top of that. Some methods worked better than others, but I was still not completely satisfied with any of the results.
My next problem was dry bread. They look amazing, but as soon as I’d bite into one, I got a mouthful of dryness with some frosting.

So, I have a brother-in-law who is an AMAZING cinnamon roll baker. I would request his cinnamon rolls at every Christmas party so I could have one decent cinnamon roll a year. This past Christmas, I asked him if he would show me his secrets. He gladly agreed. Yay!
The first thing I was doing wrong was that my dough had too much flour in it. You want a pretty sticky dough. Almost too sticky to handle. Don’t worry if they misshape while you transfer them from your counter top to your baking sheet. They’ll fix themselves when they rise and still look beautiful.
The next thing he did was spread softened butter onto the dough with his fingers. Messy, yes, but effective. I’ve adopted this method and it work well. Then he liberally sprinkled on some granulated sugar. You read that right, white granulated sugar. Traditionally brown sugar is used and you can certainly use that if it’s your preference. I kind of like the granulated sugar because it yields to the cinnamon, allowing the cinnamon to shine through more. Then he liberally sprinkled on some cinnamon.

From there, the method was pretty normal. Roll the dough up, long side to long side, slice into 1 1/2 to 2-inch slices, place on a baking sheet, and bake.
These small differences were just that: small. But they’ve made a world of difference for me. I can now bake up soft, moist, delicious cinnamon rolls that don’t have filling baked like burnt candy onto the bottoms. If you struggle with cinnamon rolls, I hope that these little tips will help you to bake the most amazing cinnamon rolls you’ve ever made
Cinnamon Rolls
Write words to make the recipe sound amazing or give an interesting tidbit or tip.
Oven: 350 F Prep: 20 minutes Rise: 90 minutes
Bake: 20 minutes Cool: 1 hour Makes: 2 dozen
Dough:
2 cups warm milk
½ cup warm water
½ cup butter, softened
1 tablespoon salt
½ cup sugar
2 eggs
2 tablespoons SAF instant yeast
4-5 cups flour (all-purpose, whole wheat, or a combination)
Filling:
Butter
Granulated or brown sugar
Cinnamon
Icing:
2 tablespoons butter
3 cups powdered sugar
½ teaspoon vanilla extract
3-4 tablespoons milk
Directions:
10. Attach a dough hoot to your stand mixer. Combine milk, water, butter, salt, sugar, eggs, and yeast. Mix at
low speed until slightly combined. 30 seconds or so is enough.
11. Add flour 1 cup at a time until the dough starts to come together, but still somewhat sticks to the sides of
the bowl. Knead for 8-10 minutes.
12. Turn dough out into an oiled bowl. Oil the top of the dough so it doesn’t dry out while it rises. Rise for 1
hour or until doubled in size.
13. Punch down and roll out into a rectangle about ½-inch thick on a floured surface.
14. Spread softened butter onto the dough to ½-inch from the edges. The butter should be pretty thin, about
1/16-inch.
15. Sprinkle sugar on butter to your preference. Keep in mind that too much sugar will result in a pooled burnt
candy mess under your cinnamon rolls. Just eyeball it. A thin layer is good.
16. Sprinkle cinnamon liberally over sugar.
17. Roll tightly from long end to long end. Pinch the dough closed and place seam side down. Cut into 1 ½ to
2-inch thick slices and transfer to a greased baking sheet. Remember that because the dough is sticky, they
might misshape in the transfer, but they’ll fix themselves while they rise.
18. Rise for 30 minutes or until doubled in size.
19. Bake at 350 degrees F for 15-20 minutes or until golden brown on top.
20. Remove from oven and allow to cool.
21. For the icing, combine all the ingredients thoroughly. You may add more or less milk depending on your
consistency preference.
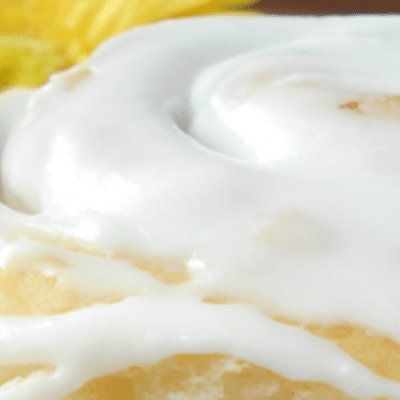
22. When the cinnamon rolls are cool, spread icing onto each one.

[/vc_column_text][/vc_column][/vc_row]


